


Where do you hide files on your system? Is it a secure location where intruders wouldn’t suspect? How about i tell you that you can hide your documents inside a picture?
Files have become very important entities in our communities, and it’s destruction or lost can be very bad so that is why most people hide files from intruders who might want to steal our informations. Today we are going to talk about the easy trick of hiding secret files in jpg images.
Since images are read from the header down, and zip files are read from the footer up, you can merge them with ease as one single file , and no one will ever know your files are hidden there.
You will need these things:
1) A picture to hide the documents.
2) Files that you wish to hide.
3) A file compression software ( 7-zip, which you can get here or the popular Winrar)
4) Command Prompt (By default, it is present on all Windows Operating system)
Steps to Hide Files Inside Any Picture.
Step 1.
The first step required to hide files inside a picture is to install the file compression software we talked about ( if you don’t have it installed yet)
Step 2
The second step required on how to hide files is for you to create a folder on the C drive. We called this folder “How to Hide Files inside an image” Inside this folder, place the files you want to hide and the picture that will be used to hide everything.
Note: The picture that will be used to hide files cannot have any spaces in the name, so we called it “smartgeek”.
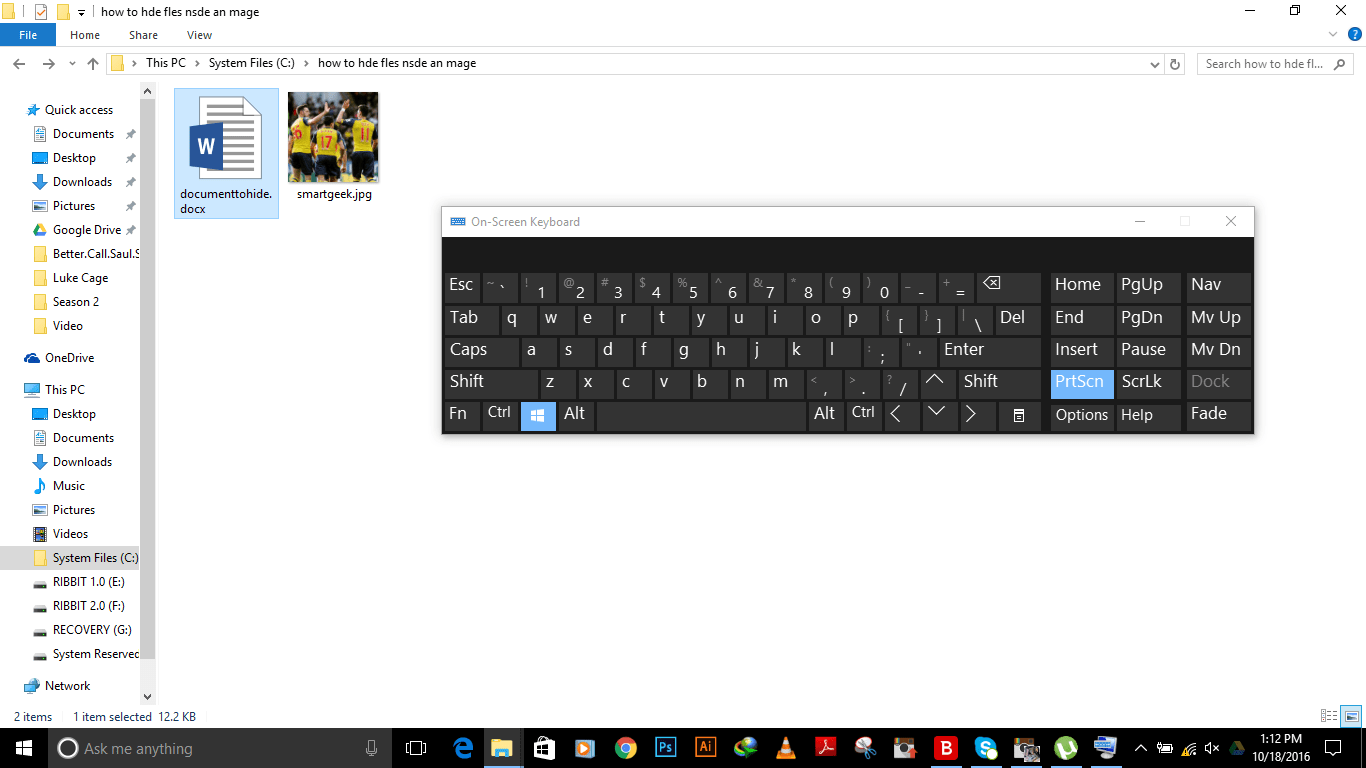
Just as you can see above we have two files, Documenttohide.docx and smartgeek.jpg(the image we would be hiding our document inside)
Step 3
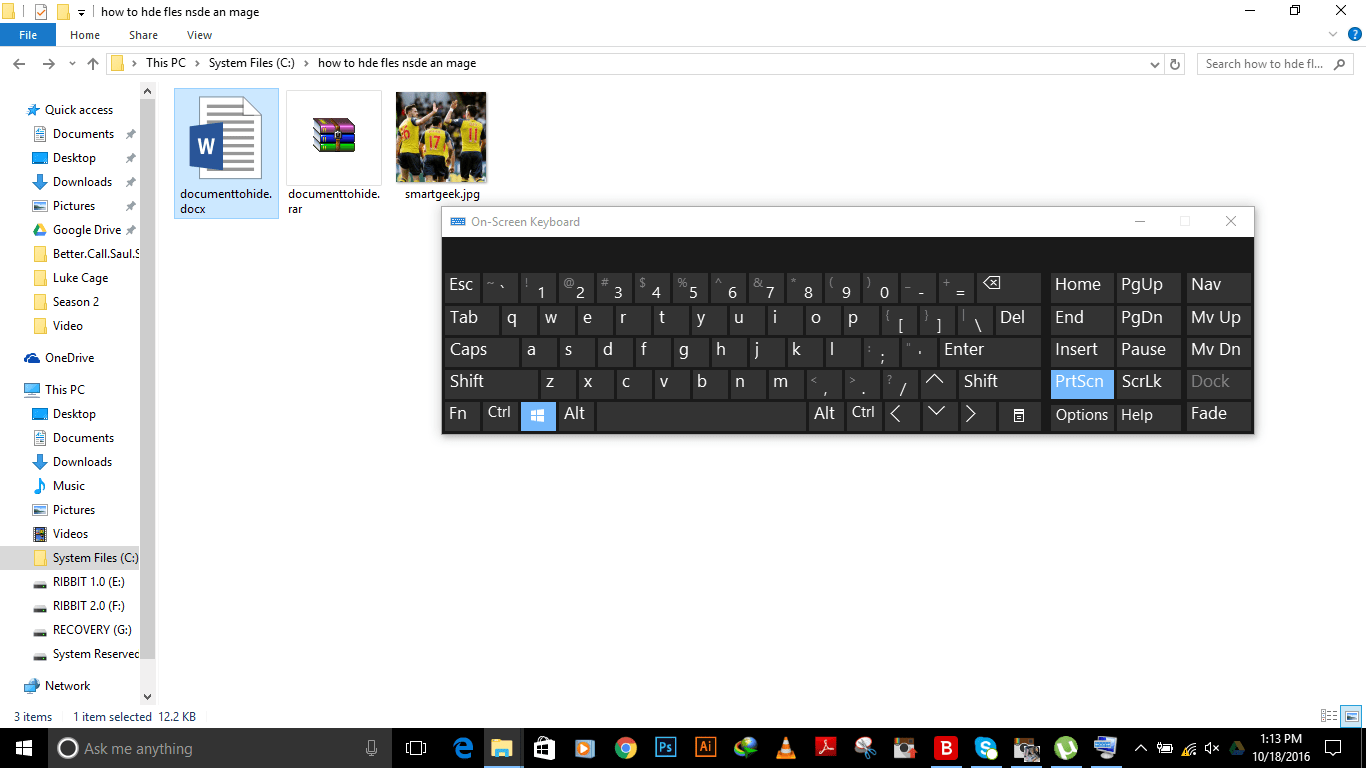
The next step is to right-click the document and select “Add to archive” which creates a “rar” file of the document we are trying to hide as you can see the result in the image below.
Step 4
After successfully completing the above step, make sure any document is not selected, then select shift+ right-click inside the folder, a menu option comes up, select “open command window here”
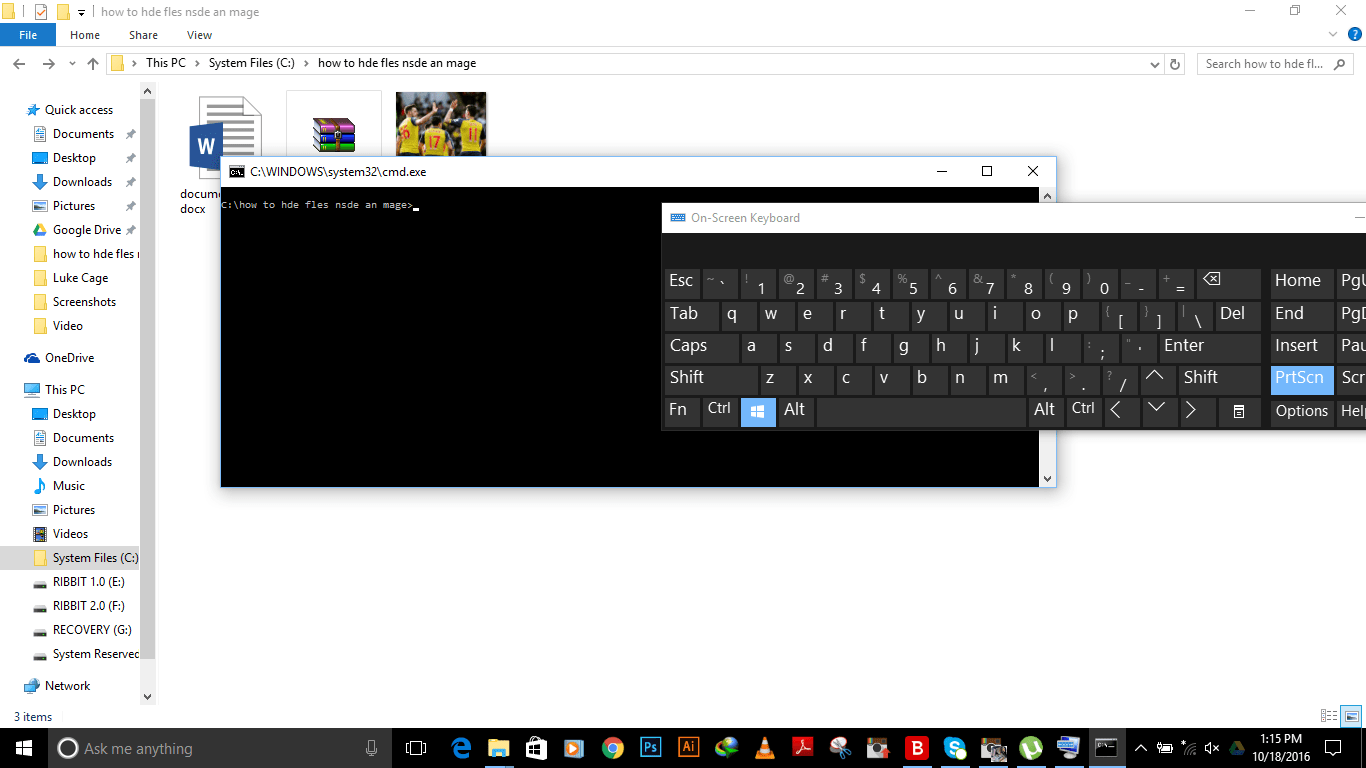
It then automatically opens the command windows prompt inside the folder without need for you to use the change directory command -“cd”.
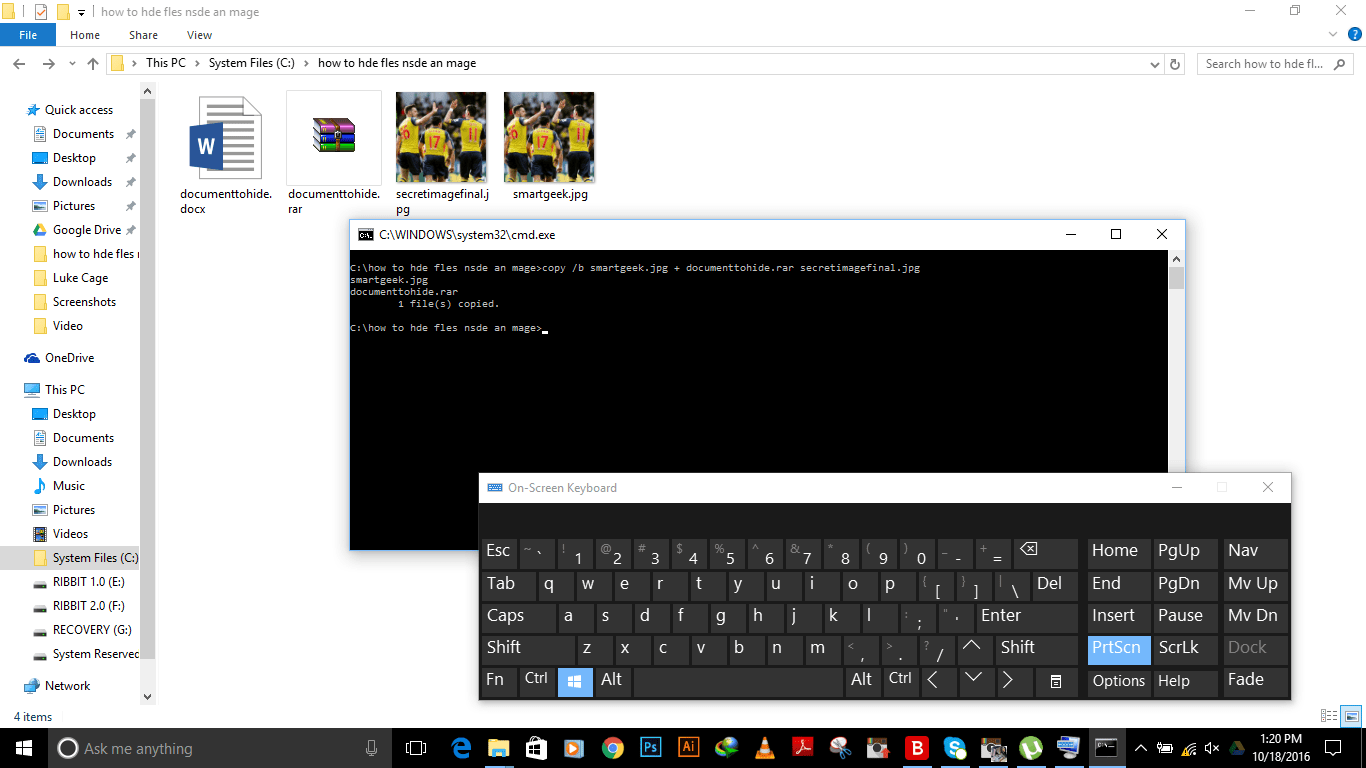
Step 4
Type copy /b smartgeek.jpg + documenttohide.rar secretimagefinal.jpg and hit Enter.
This step is the most important and you need to execute it well. Make sure you replace the file names with the respective ones you are using. As you can see in the image below, a new file is created called secretimagefinal.jpg
How to Access the hidden files
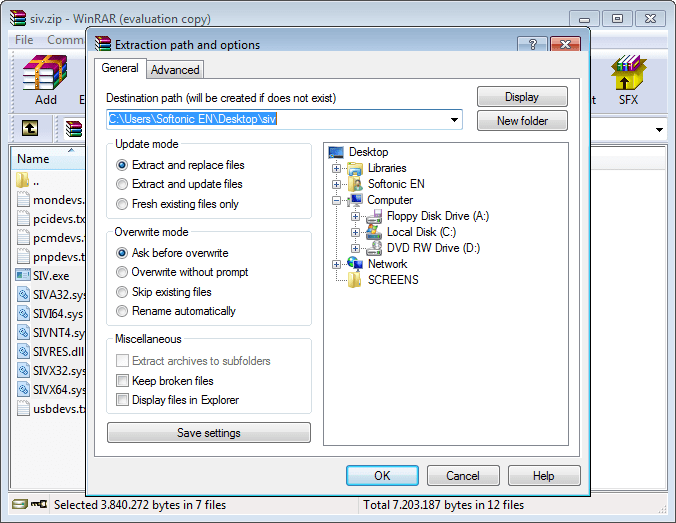
- Have in mind that the file is in jpg format so we will first Open WinRar archiver, Click on File and Select Open archive.
- Now Navigate to the Path where you have saved the files
- Select All files and all the files in the folder would show up
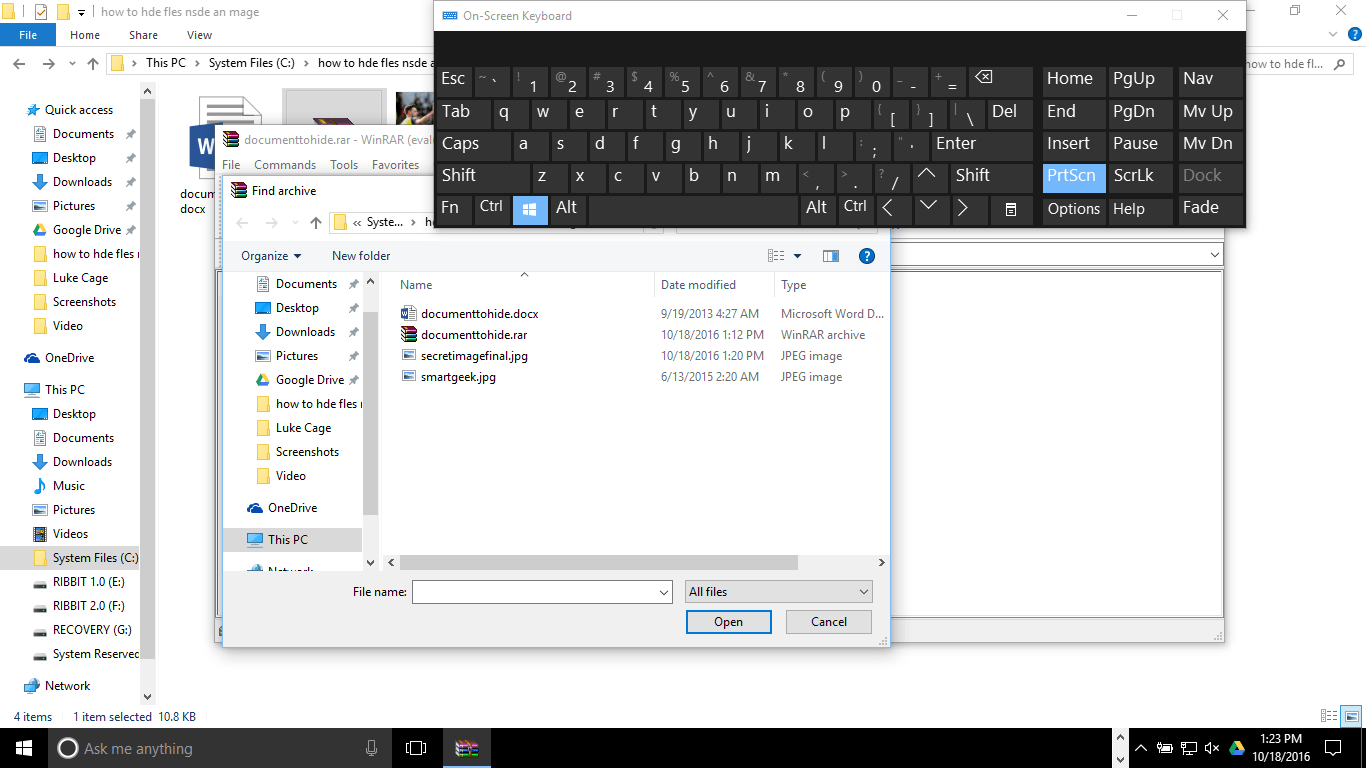
- Select the converted-hidden file “secretimagefinal.jpg” to open it and then click Extract.
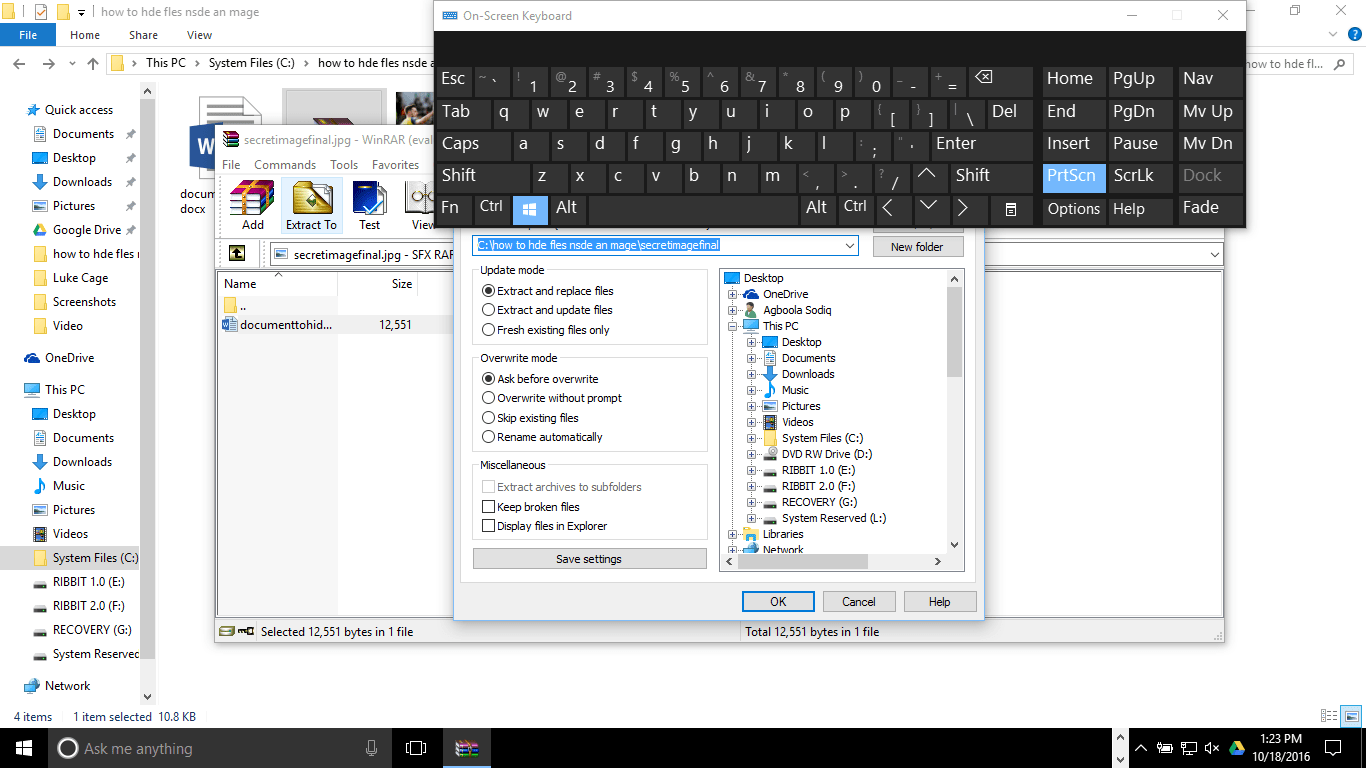
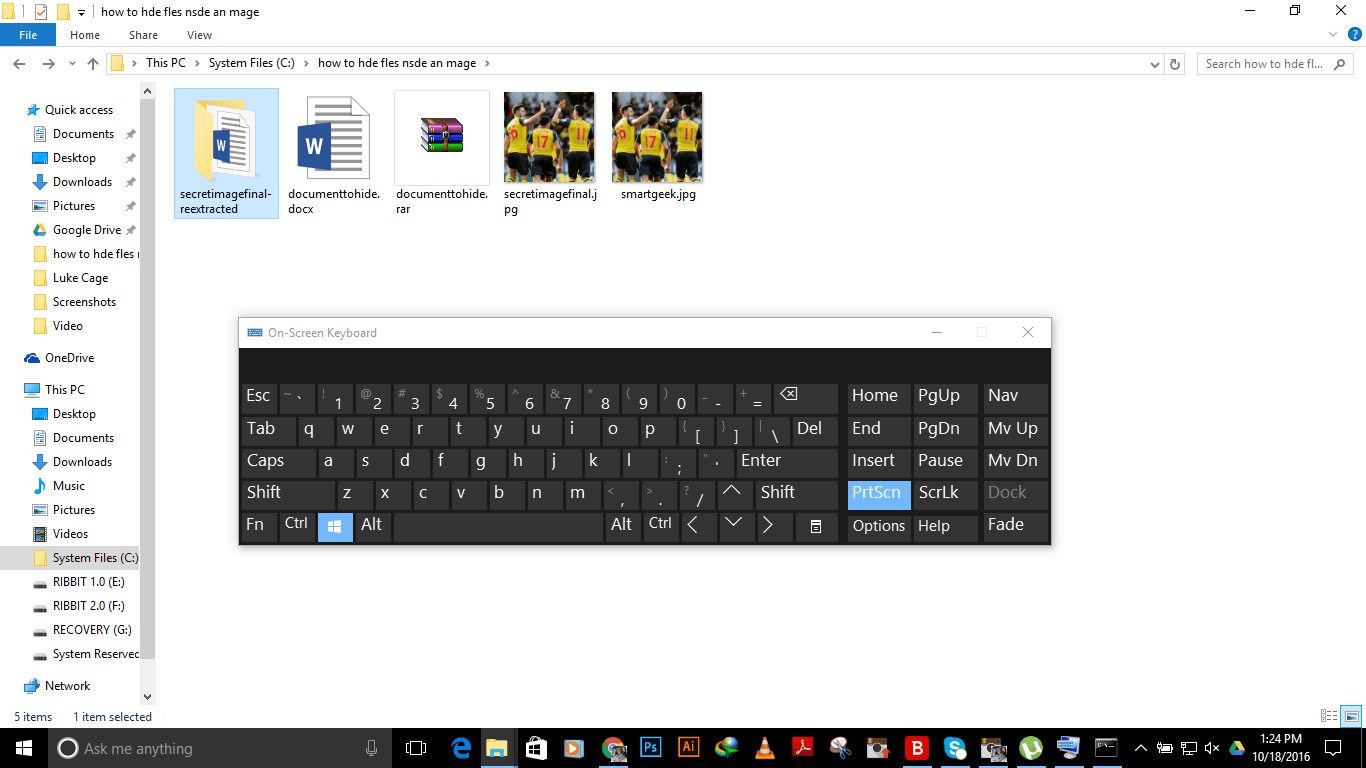
After Extracting you will have the hidden files extracted. See image below to get the output.
This Procedure of how to Hide Files In an image is known as Steganography. This will give your very precious files added safety as well as security.
If you have any problem with this technique to Hiding files inside an image then feel free to comment below. I will try to solve your problems as soon as possible. Blessings!


2 Comments
Thank you for this. Really helpful
You are welcome!