


The iPhone hacks you need to know to have a smooth sailing experience on your iPhone are everything in this article. Did you just get an iPhone, or have you been using it for a while but have never really explored its features and are willing to find out some new cool things your phone can do? Then this post is the answer to your prayers.
Because almost every app has a few hidden tricks, it takes some digging to find them all. While some iPhone hacks are simply hidden, others necessitate a bit of a workaround.
When compared to Android, iOS is notoriously more locked down, with fewer options to tinker with, but many people are unaware of how many extra options you can unlock, or what you can do with them beyond the obvious.
Her e are nine of our preferred iPhone hacks for improving the way iOS functions or adding more options to make your phone systems more effective for you.
9 Iphone Hacks You Probably Didn’t Know
Read also: 10 best online investment platforms in Nigeria
Open Your Favorite App Using The Back Tap Gesture
Among all of the cool iOS 14 features and the iPhone hacks, Back Tap is unquestionably has to be the coolest. Its ability to not only activate a wide range of system features such as Siri, app switcher, reachability, spotlight, and more, but also launch your favourite apps with Back Tap, is what makes it so cool.
To open your favourite app, use backtapping.
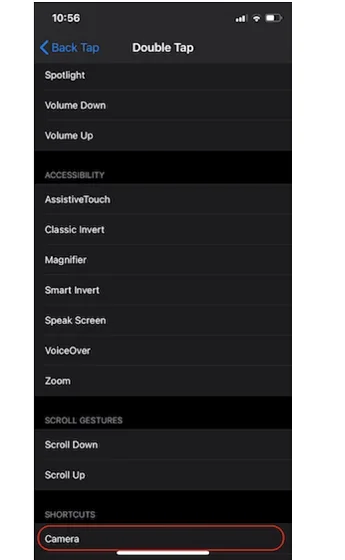
You can use the Shortcuts app to select which app you want to launch with the double-tap gesture. After that, go to the Settings app -> Accessibility -> Touch -> Back Tap -> Double Tap/Triple Tap and select the shortcut. After that, all you have to do to access that app is tap on the back of your iPhone, and you’re ready to go!
Make A PDF Copy Of Any Document
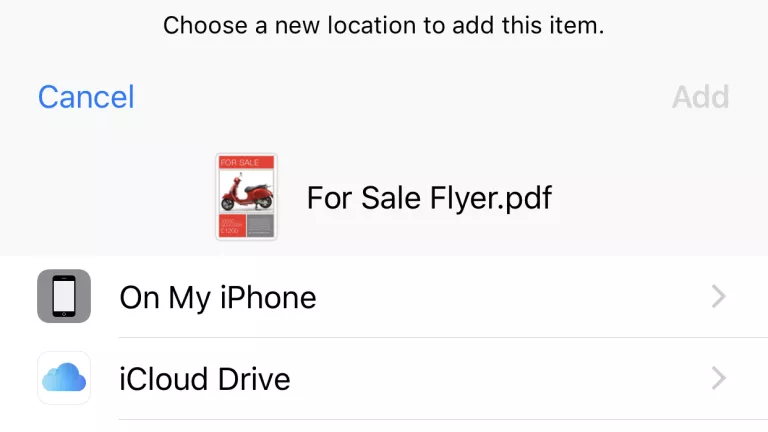
If you want to send a pdf to someone while trying to keep all of your formatting and design choices, it’s usually best to do so as a PDF. Despite its utility, however, few document apps offer this as an export option. However, there is a way to get around this.
If a software could indeed copy a document, it can discreetly outsource a PDF as well. Select the print option in the app, and then, on the Printer Settings screen, utilise 3D Touch to hard press the document preview at the bottom. This will bring up a new view of the PDF-converted document. Tap the Share button in the upper right corner to email or save it to another app.
Locate The Strongest Cellular Signal In The Area
What an ingenious little feature! Forget about waving your phone around and walking around to find the best cellular signal. Simply use this trick to get a clear indication of signal strength:
Launch the Phone app.
Enter 300112345#*.
Press the call button.
This brings up the Field Test screen in iOS 6 through 10, and you can skip to step 7. It loads the Dashboard on iOS 11 and later.
Select LTE.
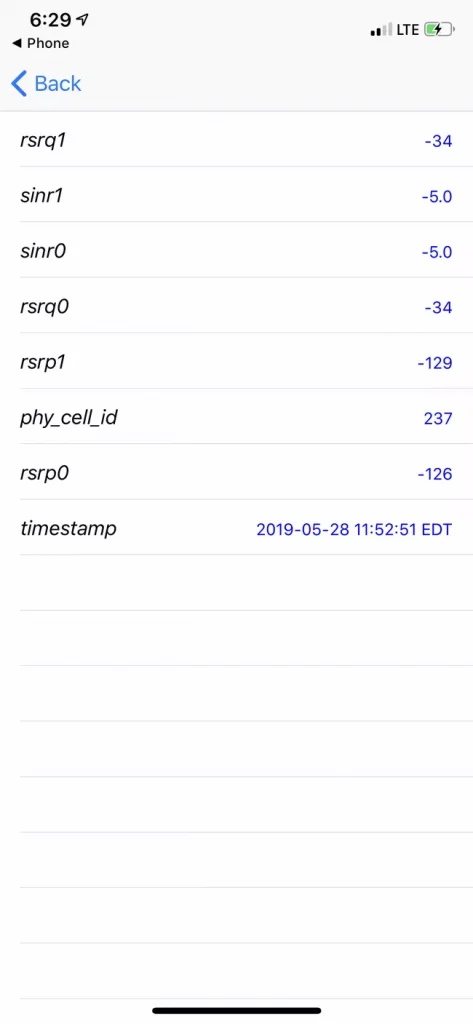
Tap on Serving Cell Meas and look for the lines rsrp0 (your current cell tower) and rsrp1 (your backup cell tower) (the closest backup tower).
In the top left corner, tap the signal strength indicator.
The smaller the number, the stronger the signal. So -90 is a fantastic signal, -110 is adequate, and -125 is non-existent. Walk about to see how well the signal level changes, and use your phone where the number is low.
Read also: 8 Tips To Achieve Your Personal Goal (Effective Success Strategies)
Automatically Change Wallpaper
You should rarely keep wallpapers for more than a day or two, regardless of how nice they are. Instead of manually setting a wallpaper in the Photos/Settings app, I prefer to use a trick to change the wallpaper automatically. And all with a single tap on the home screen. Doesn’t it sound intriguing?
If you think this hack of iPhone hacks is worth a shot, make an album of all the wallpapers you want to use. After that, save the wallpaper shortcut to your shortcut library. Next, create a shortcut to your customised photo album. After that, simply tap on the shortcut icon to change your device’s wallpaper. Check out the GIF above!
Do Not Disturb Activity For A Set Period Of Time.
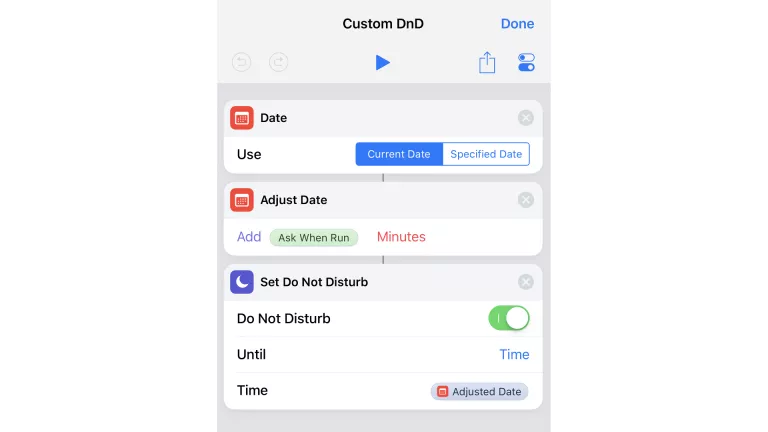
iOS 12 introduces some new options for activating Do Not Disturb, so you’re not interrupted by notifications during meetings or dinner. But there are only a few presets: what if you want to turn it on for a specific amount of time? Again, the Shortcuts app can assist us: let’s create a tool for this, which you can then activate from the Shortcuts widget. The end result will be a box that asks you for a number of minutes, and when you tap “Done,” it will turn off Do Not Disturb for that amount of time.
To begin, open Shortcuts and make a new shortcut. Add this action by searching for “date” in the Actions box at the bottom. Check that “Current Date” is selected. Now, look for “adjust date” and add it as the next action. Tap the ‘0,’ then Variables, then ‘Ask When Run,’ and finally ‘Done.’
Finally, select ‘Minutes’ from the pop-up menu by tapping ‘Seconds.’ What we’ve done here is created a tool that looks at the current time and then prompts you to enter a number of minutes. It multiplies the number of minutes by the current time and saves the result for our next step. Let’s finish with our final action: Look for “Do Not Disturb” and add it. In this action, tap the switch until it turns green, indicating that Do Not Disturb is enabled. Tap ‘Until’ and then ‘Time.’ Tap ‘Time,’ and “Adjusted Date” should appear at the top of the list (if not, tap “Variables” and select it). This step retrieves the time information we saved earlier (the current time plus the number of minutes you specified), then instructs Do Not Disturb to turn on from now until the time specified. You’ve now created a programmable Do Not Disturb shortcut.
Allow Siri To Assist You In Taking Photos
Everybody already knows people can ask Siri questions, but did you guys know Siri can help them take faster photos? While Siri cannot actually capture the photo, it can open the Camera app to the settings you specify, so all you have to do is tap the camera button (or click the volume button). Here’s what you should do:
Activate Siri (depending on your model, hold down the Home or Side button) and ask Siri to take a photo or video. “Hey Siri, take a photo,” are your options (you can also say “picture”).
“Siri, please take a square photo.”
“Hey Siri, take a panorama picture.”
“Hey Siri, record a video.”
“Siri, record a slow-motion video.”
“Siri, record a tap-lapse video.”
“Hey Siri, please take a selfie.”
When you’ve found the image you’re looking for, tap the camera or volume button.
Remove A Specific Image From The Photo Widget
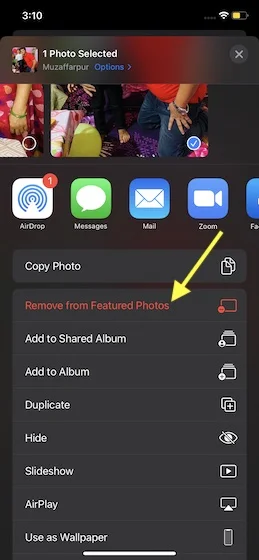
The Photo Widget is one of the best looking main screen widgets introduced by Apple in iOS 14. While you may have enjoyed using it on your iPhone to keep track of fond memories right from the home screen, the lack of better control over which photos to show and which to hide may irritate you greatly.
Tap-on-Remove-from-featured-photos
Fortunately, there is a reliable method for hiding specific images from the photo widget. Simply tap on the image in the photo widget that you don’t want to see. Then, tap the Share button and select Remove from Featured Photos to remove that image from the widget.
Read also: Expert Guide: 15 Tips to Boost Your Engagement on Instagram
Determine How Long You’ve Been Waiting For A Response.
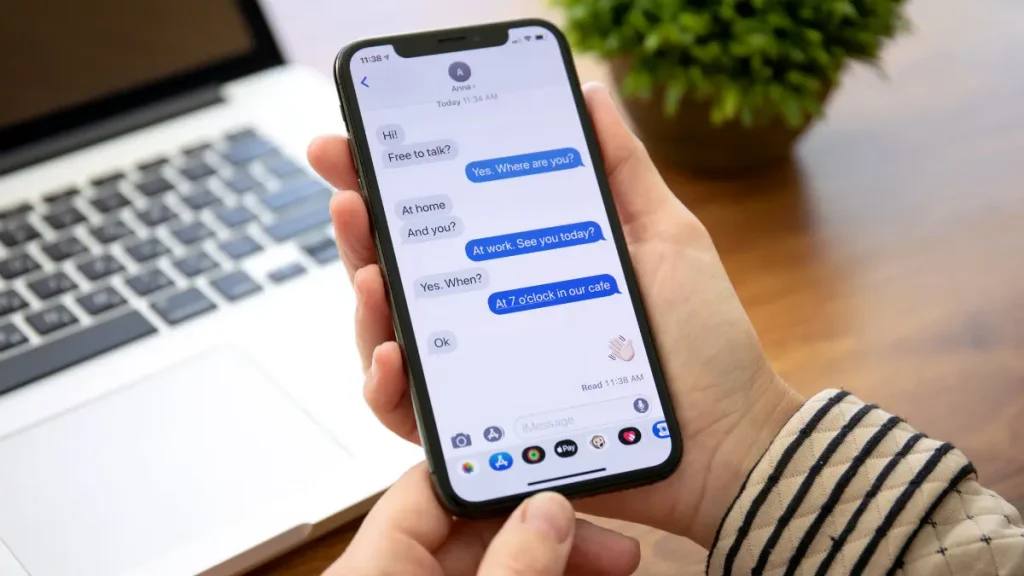
This is one of my favourite iPhone hacks. We’ve been through that, eternally checking our phones for a text response, wondering how long it had been since we sent our text of adoration demand. However, there is an easy way to find out if there is one – simply swipe in from the right-hand side of the screen when in a messenger thread to see exact delivery times for every message sent and received. True, it’s not as motivating as WhatsApp’s blue ticks, but it’ll make you wonder why it’s taking over thirty minutes for your other half to respond. Is it true that things take that long?
To Undo Typing, Shake The Device.
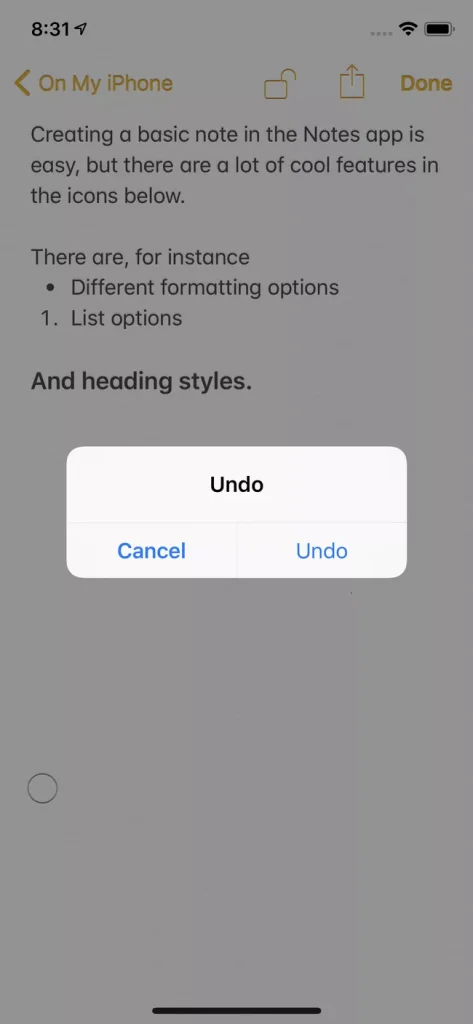
If you’re typing a note, a text message, or another type of text and want to delete what you’ve just written, you don’t have to use the delete key on your keyboard. If you have this hack enabled, all you have to do to delete your writing is shake your iPhone. Here’s what you should do:
Select Settings.
Select Accessibility.
To interact, simply tap (on iOS 13 and up only).
Tap Shake to Undo in the Interaction section.
Slide the slider to the on or green position.
Then, whenever you type something you want to delete, shake your phone and tap Undo in the pop-up window.
If you’re still trying to figure out which iphone is best for you, visit their official website


